ECG Interpretation: A Step-by-Step Guide
A 12-lead ECG can look like a wall of squiggles until you have a system — and once you do, the same five questions unlock almost every tracing you will ever see. This guide walks through that systematic approach step by step, the way it is tested on the RCIS exam and used at the bedside.
Why ECG Interpretation Needs a System
The single biggest mistake in ECG interpretation is pattern-hunting — glancing at a strip, spotting one dramatic finding, and calling it a day. That approach misses the quiet abnormalities that change management, and it falls apart the moment a tracing has two problems at once. The fix is boring but powerful: read every ECG the same way, in the same order, every time. A systematic approach turns an intimidating tangle of waves into a short checklist you can run in under a minute.
The framework nearly every clinician and educator uses can be remembered as rate, rhythm, axis, intervals, and morphology. Some add a P-wave step or a formal 'is this ECG technically adequate?' check at the front, but the backbone is those five questions asked in a fixed sequence. Because you always ask them in the same order, you stop skipping steps under pressure — and the RCIS exam rewards exactly that discipline.
This piece is the practical, step-by-step version. If you want the broader teaching pillar with the rhythm gallery, our full ECG guide and the companion article on how to read an ECG cover the same ground from different angles. Here we stay focused on the sequence itself.
This article is educational and written for RCIS exam preparation. It is not medical advice; clinical decisions belong to the treating team following current guidelines.
Before You Read: Setup and Calibration
Two seconds of setup saves you from a wrong answer. Before interpreting anything, confirm the paper speed and the voltage calibration, and glance at lead placement. Standard recording runs at 25 mm per second, so on the grid each small box is 0.04 seconds wide and each large box (five small boxes) is 0.20 seconds. Vertically, the standard calibration is 10 mm per millivolt, meaning one large box equals 0.5 mV. You will usually see a small rectangular calibration pulse at the edge of the strip confirming this.
| Grid unit | Time (horizontal) | Voltage (vertical) |
|---|---|---|
| 1 small box | 0.04 s (40 ms) | 0.1 mV (1 mm) |
| 1 large box | 0.20 s (200 ms) | 0.5 mV (5 mm) |
| 5 large boxes | 1.0 s | — |
Why it matters: if the machine is set to double standard (20 mm/mV), voltages look artificially tall and you might over-call hypertrophy. If paper speed is off, every interval you measure is wrong. Lead reversal — the classic being swapped arm electrodes — produces a bizarre axis and inverted complexes in lead I that can masquerade as pathology. A quick sanity check of the calibration marker and lead I orientation heads off these traps before they cost you.
The 12 leads themselves fall into groups that each 'look at' a region of the heart, an idea we lean on heavily once we reach axis and ischemia. If the lead-to-territory relationship is hazy, the walkthrough in our 12-lead ECG interpretation guide lays it out lead by lead.
Step 1 — Rate
Start with heart rate because it immediately narrows the differential and flags anything dangerously fast or slow. The fastest bedside method is the 300 rule: find a QRS that lands on a heavy gridline, then count 300, 150, 100, 75, 60, 50 for each successive heavy line until the next QRS. If the next beat falls on the third heavy line, the rate is 100; on the fifth, it is 60.
- Regular rhythm, quick estimate: 300 ÷ (number of large boxes between two R waves).
- Irregular rhythm: count the QRS complexes on a 6-second strip and multiply by 10. This is the reliable method for atrial fibrillation, where the 300 rule fails.
- Very slow rates: the 1500 rule (1500 ÷ number of small boxes between R waves) gives precision when beats are far apart.
Define your terms the way the exam does: a normal adult rate is 60–100 bpm. Below 60 is bradycardia; above 100 is tachycardia. Those thresholds anchor every rhythm call that follows — a regular narrow-complex rhythm at 40 points you toward heart block or sinus bradycardia, while the same morphology at 160 points toward a supraventricular tachycardia.
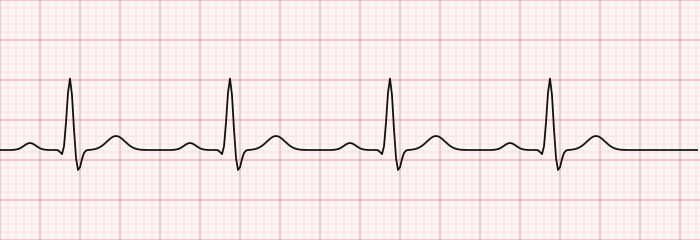
Step 2 — Rhythm
With a rate in hand, decide whether the rhythm is regular or irregular, and whether it is sinus. March out the R-R intervals with calipers or the edge of a paper — evenly spaced complexes are regular; varying gaps are irregular. Then ask the defining question of normal conduction: is there a P wave before every QRS, and a QRS after every P? If yes, and the P waves are upright in the inferior leads, you are looking at sinus rhythm.
Four questions sort almost every rhythm:
- Regular or irregular? Irregularly irregular with no discernible P waves is the fingerprint of atrial fibrillation.
- P waves present and normal? Absent, chaotic, or sawtooth P waves shift you toward atrial fibrillation or flutter.
- One P per QRS? More P waves than QRS complexes signals AV block.
- Narrow or wide QRS? Narrow means the impulse used the normal conduction system; wide raises the question of a ventricular origin or a bundle branch block.
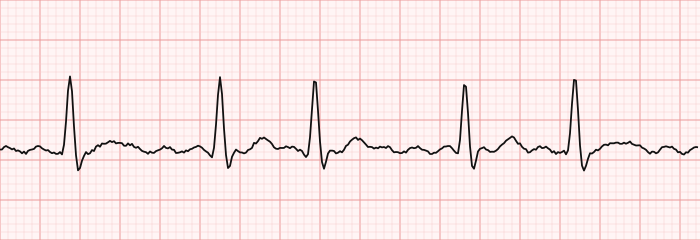
This step is where most named rhythms get identified, from atrial fibrillation to supraventricular tachycardia to ventricular tachycardia. For a structured decision tree that sorts rhythms by rate and QRS width, our dedicated ECG rhythm interpretation page is built around exactly that grid, and you can drill the strips themselves in the ECG strip identification practice set.
Step 3 — Axis
The mean QRS axis describes the net direction of ventricular depolarization in the frontal plane. A normal axis lies between −30° and +90°. Shifts outside that range point to specific problems — left axis deviation with left anterior fascicular block or inferior infarction, right axis deviation with right ventricular strain, lung disease, or a left posterior fascicular block.
The fastest bedside estimate is the two-lead (quadrant) method using leads I and aVF. Look only at whether the net QRS is positive or negative in each:
| Lead I | Lead aVF | Axis |
|---|---|---|
| Positive | Positive | Normal |
| Positive | Negative | Possible left axis deviation (check lead II) |
| Negative | Positive | Right axis deviation |
| Negative | Negative | Extreme axis ("northwest") |
A handy refinement: if lead I and aVF are both positive the axis is normal — think of the two thumbs pointing 'toward each other' down into the chest. When lead I is positive but aVF is negative, add lead II; if lead II is still positive, the axis is normal-to-slightly-left rather than true left deviation. Extreme axis — both negative — is uncommon and, in a wide-complex tachycardia, actively supports a ventricular origin.
Axis is not just a number to report. It carries diagnostic weight, and the same lead-groupings you use for axis reappear when you localize ischemia, which is why understanding the coronary artery anatomy behind each territory pays off twice.
Step 4 — Intervals
Now measure the timing of conduction. Three intervals do most of the work: the PR interval, the QRS duration, and the QT interval. Each maps to a specific stretch of the conduction pathway, so an abnormal value tells you where conduction is delayed.
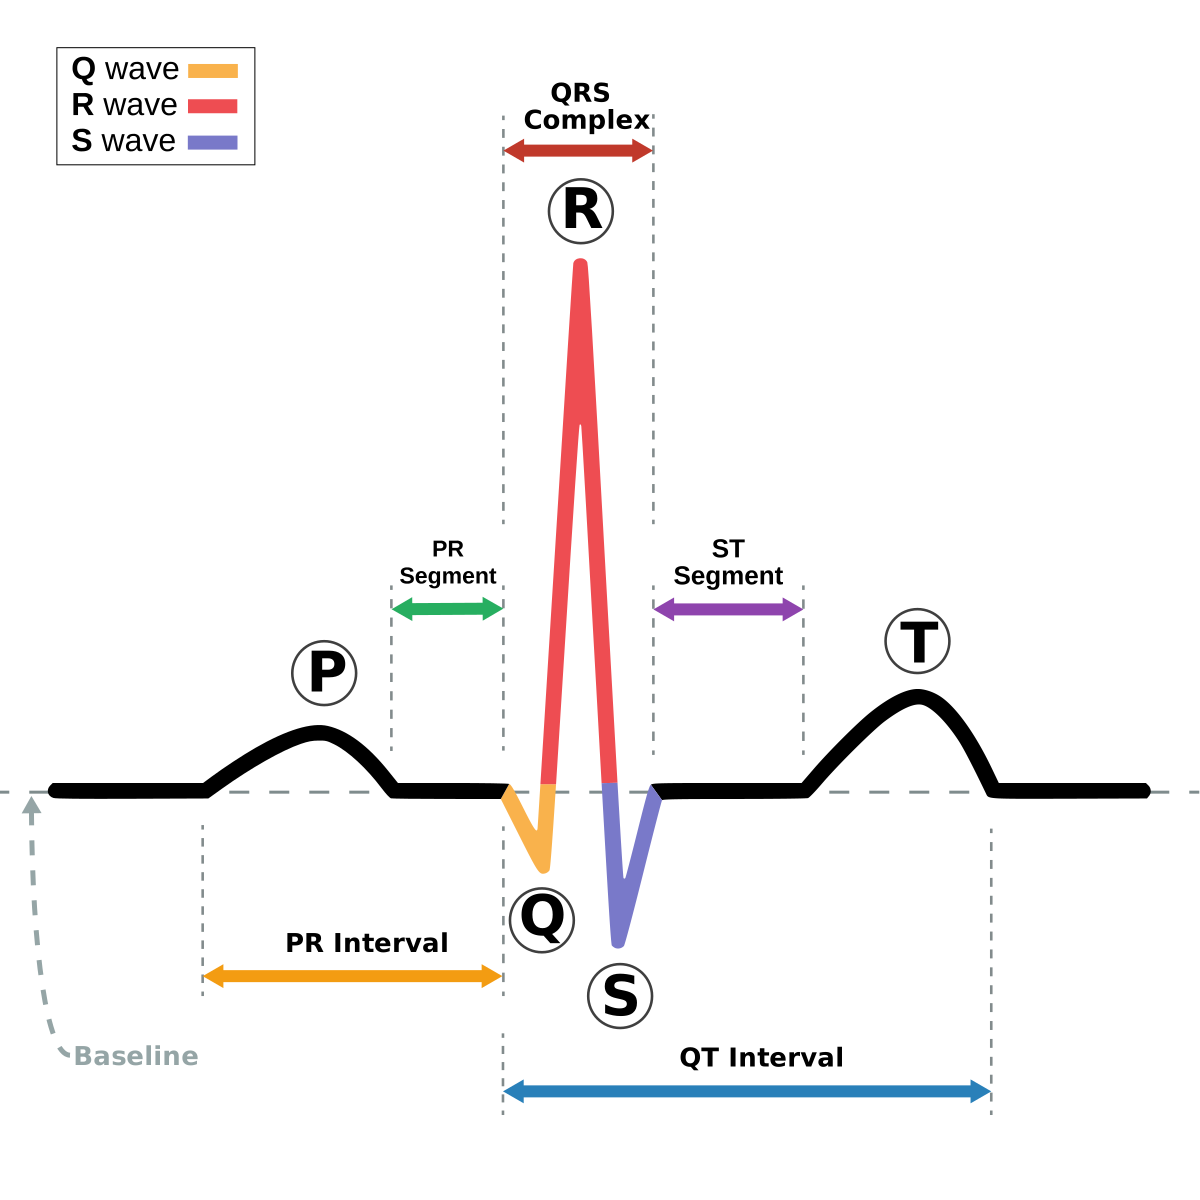
| Interval | Normal range | What it represents | Prolonged means |
|---|---|---|---|
| PR | 120–200 ms (3–5 small boxes) | Atrium to ventricle via AV node | First-degree AV block or worse |
| QRS | < 120 ms (< 3 small boxes) | Ventricular depolarization | Bundle branch block or ventricular rhythm |
| QT (QTc) | QTc ~ 350–450 ms (men), up to ~470 ms (women) | Total ventricular depolarization + repolarization | Risk of torsades de pointes |
The PR interval is measured from the start of the P wave to the start of the QRS. A fixed PR longer than 200 ms is first-degree AV block; a progressively lengthening PR until a beat drops is Mobitz I; and complete dissociation of P waves from QRS complexes is third-degree heart block. The QRS width sorts narrow (supraventricular) from wide (bundle branch block or ventricular) rhythms — the same fork you met in the rhythm step.
The QT interval demands correction for heart rate, because it shortens as the rate rises. The corrected value, QTc, is what actually predicts danger: a long QTc sets the stage for torsades de pointes. Because the math is fiddly, most clinicians reach for a tool — our QTc calculator applies the standard formulas — and the deeper physiology lives in the dedicated QT interval article.
Step 5 — Morphology (P, QRS, ST, T)
The final step examines the shape of each waveform, moving left to right across the complex: P wave, QRS, ST segment, and T wave. This is where the ECG stops being about timing and starts revealing chamber enlargement, prior infarction, ischemia, and electrolyte effects.
- P wave: tall and peaked suggests right atrial enlargement; wide and notched suggests left atrial enlargement.
- QRS: pathologic Q waves mark old infarction; tall R waves in the left precordial leads suggest left ventricular hypertrophy; an rSR' in V1 with a wide QRS is the classic right bundle branch block pattern.
- ST segment: the highest-stakes finding. Elevation signals acute injury; depression signals ischemia or reciprocal change.
- T wave: inversion can mean ischemia or strain; peaked, tented T waves flag hyperkalemia.
ST-segment elevation is the finding you cannot afford to miss. In the right clinical setting it means an acute ST-elevation myocardial infarction, and the pattern of which leads are involved localizes the culprit coronary artery. That lead-to-artery mapping — inferior leads to the right coronary, anterior leads to the left anterior descending, lateral leads to the circumflex — is the heart of our STEMI ECG interpretation guide, and it ties directly back to the myocardial infarction workup and coronary artery disease that bring patients to the lab.
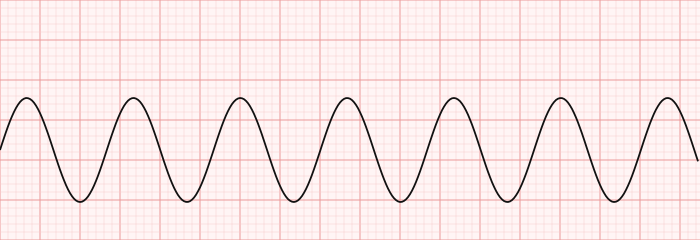
Morphology is also where subtle-but-important patterns hide: a delta wave of pre-excitation, the coved ST of Brugada, the diffuse ST elevation of pericarditis, or the U waves of hypokalemia. You do not have to catalog every one on first pass — but by reaching this step last, after rate, rhythm, axis, and intervals, you arrive with enough context to interpret what the shapes mean.
Putting the Steps Together
A systematic read only works if you actually run it end to end. Here is the full sequence as a single checklist you can rehearse until it is automatic:
- Calibration: confirm 25 mm/s and 10 mm/mV; check for lead reversal.
- Rate: apply the 300 rule (or 6-second count if irregular). Fast, slow, or normal?
- Rhythm: regular or irregular? Sinus? P before every QRS?
- Axis: leads I and aVF — normal, left, right, or extreme?
- Intervals: PR, QRS, and QTc — each within range?
- Morphology: P-wave shape, Q waves, ST elevation or depression, T-wave changes.
Run every strip through all six steps even when the diagnosis jumps out at you. The atrial fibrillation you spot in the first second may also hide a subtle ST depression that changes the plan — and the exam loves ECGs that carry two findings at once. Speed comes with repetition; accuracy comes from never skipping a step.
For the RCIS candidate, this sequence is worth drilling against real tracings rather than just reading about. Our RCIS ECG practice questions present rhythms and 12-leads the way the exam does, and the printable one-page reference in our ECG interpretation cheat sheet collapses every table above onto a single sheet you can keep at the bench.
Why This Matters in the Cath Lab
For the registered cardiovascular invasive specialist, ECG interpretation is not a classroom exercise — it is live situational awareness during a procedure. The monitor is your early-warning system. A run of wide complexes as a catheter brushes the ventricle, new ST elevation during balloon inflation, or a sudden bradycardia after contrast in the right coronary all demand that you read the change instantly and speak up.
That is why the same five-step discipline transfers directly to the lab. Recognizing a rhythm shift and knowing whether it is benign catheter irritation or the start of something dangerous is a core competency, and it dovetails with the hemodynamic picture you may be monitoring at the same time — the pressures covered in our hemodynamics guide and the anatomy in the cardiac anatomy guide. When ischemia shows up on the trace, it often means the team is heading toward intervention, so understanding the difference between PCI and diagnostic catheterization keeps you a step ahead.
The exam mirrors this reality. Expect strips embedded in clinical vignettes where the right answer depends not just on naming the rhythm but on knowing what it means for the patient on the table. Reading systematically is what lets you get both halves right under time pressure.
Key Takeaways
- Use a system every time: read rate, rhythm, axis, intervals, and morphology in that fixed order — a systematic approach beats pattern-hunting.
- Confirm calibration first: 25 mm/s paper speed and 10 mm/mV voltage, and rule out lead reversal.
- Rate: the 300 rule for regular rhythms (300-150-100-75-60-50); a 6-second count for irregular ones. Normal is 60–100 bpm.
- Rhythm: regular vs irregular, and a P wave before every QRS defines sinus rhythm; irregularly irregular with no P waves is atrial fibrillation.
- Axis: leads I and aVF sort the quadrant into normal, left, right, or extreme deviation.
- Intervals: PR 120–200 ms, QRS < 120 ms, and a rate-corrected QTc — a long QTc warns of torsades.
- Morphology: P-wave shape, pathologic Q waves, and above all ST-segment elevation, which can localize an acute infarct to a coronary territory.
- In the cath lab the same sequence becomes real-time monitoring — this is educational content for RCIS preparation, not medical advice.
Practise ECG interpretation
Identify real ECG strips with instant feedback and explanations.
Practise ECG Strips →Frequently asked questions
What is the systematic approach to ECG interpretation?
The standard systematic approach reads every tracing in the same fixed order: rate, then rhythm, then axis, then intervals, then morphology. Many clinicians add a calibration check at the front and a specific ST/T-wave look at the end. Using the same sequence every time prevents you from skipping steps and catches tracings that carry more than one abnormality.
How do you calculate heart rate on an ECG?
For a regular rhythm, use the 300 rule: divide 300 by the number of large boxes between two R waves, or count down 300, 150, 100, 75, 60, 50 across successive heavy gridlines. For an irregular rhythm such as atrial fibrillation, count the QRS complexes on a 6-second strip and multiply by 10.
What are the normal ECG interval values?
The PR interval is normally 120–200 ms (3–5 small boxes), the QRS duration is under 120 ms (less than 3 small boxes), and the corrected QT (QTc) is roughly 350–450 ms in men and up to about 470 ms in women. Values outside these ranges point to conduction delay, bundle branch block, or repolarization abnormality.
How do you determine the QRS axis quickly?
The fastest method uses leads I and aVF. If both are net-positive the axis is normal; positive lead I with negative aVF suggests possible left axis deviation (confirm with lead II); negative lead I with positive aVF is right axis deviation; and both negative is an extreme or 'northwest' axis. A normal axis lies between −30° and +90°.
What does ST elevation mean on an ECG?
ST-segment elevation in the right clinical setting signals acute myocardial injury — a ST-elevation myocardial infarction. The pattern of leads involved localizes the culprit artery: inferior leads point to the right coronary, anterior leads to the left anterior descending, and lateral leads to the circumflex. It is the highest-priority finding on any tracing and warrants urgent evaluation.
How can you tell a normal sinus rhythm from atrial fibrillation?
Normal sinus rhythm is regular, with an upright P wave before every QRS at a rate of 60–100 bpm. Atrial fibrillation is irregularly irregular, has no discrete organized P waves, and shows a wavy fibrillatory baseline instead. The absence of consistent P waves plus the chaotic R-R spacing is the giveaway.
Why do you correct the QT interval for heart rate?
The QT interval naturally shortens as heart rate rises and lengthens as it falls, so a raw QT can be misleading. Correcting it for rate (giving the QTc, using formulas such as Bazett's) produces a value that actually predicts risk. A prolonged QTc is what sets the stage for the dangerous polymorphic rhythm torsades de pointes.
What paper speed and calibration is standard for an ECG?
Standard ECGs are recorded at 25 mm per second, so each small box is 0.04 s and each large box is 0.20 s. The standard voltage calibration is 10 mm per millivolt, shown by a rectangular calibration pulse at the edge of the strip. Confirming both before you measure anything prevents errors in rate and interval calculations.
Do you still need to read an ECG systematically once you can recognize rhythms at a glance?
Yes. Pattern recognition is fast but incomplete — it tends to lock onto the first obvious finding and miss quieter ones. Even experienced readers run the full rate-rhythm-axis-intervals-morphology sequence on every tracing, because many ECGs carry two abnormalities at once and the second one is often the clinically important one.
Sources & further reading
- Cardiovascular Credentialing International (CCI)
- American College of Cardiology
- American Heart Association
- MedlinePlus (U.S. National Library of Medicine)
External links are provided for reference; always confirm current details with the official source.